How to Automate JavaScript Analysis in Burp Suite

If you're a bug bounty hunter or pentester, you probably spend most of your day in Burp Suite. It's where the magic happens, intercepting requests, tweaking parameters, watching how apps respond to your prodding.
But here's the thing: there's always been this awkward gap in the workflow when it comes to automated reconnaissance.
You know the drill. You're browsing through a target, spot something interesting in the HTTP history, maybe a chunky JS file or a complex API response, and then you have to break your flow. Copy the URL, jump over to your terminal, fire up LinkFinder or SecretFinder, and wait. It's not terrible, but it's disruptive. You're constantly switching between your dynamic testing setup and your static analysis tools.
So what's the fix? We've built something that brings Jsmon's analysis engine directly into your proxy workflow.
The Jsmon Burp Suite Extension basically closes that gap. It runs quietly in the background, watches your proxy traffic, picks out relevant HTTP responses, and ships them off to Jsmon's cloud engine for deep analysis, all without you having to leave Burp or break your concentration. And with the latest v1.2.0 update, it now supports VPN Mode, meaning you can even analyze internal apps and localhost environments that the public internet can't reach.
Installation & Setup
Setting this up takes maybe a minute, tops. Since it's built as a Java extension, it plugs right into Burp's native API.
Here's what you do:
Download the extension
Head to our GitHub Releases page and grab the latest .jar file:
https://github.com/jsmonhq/jsmon-burpsuite-extension
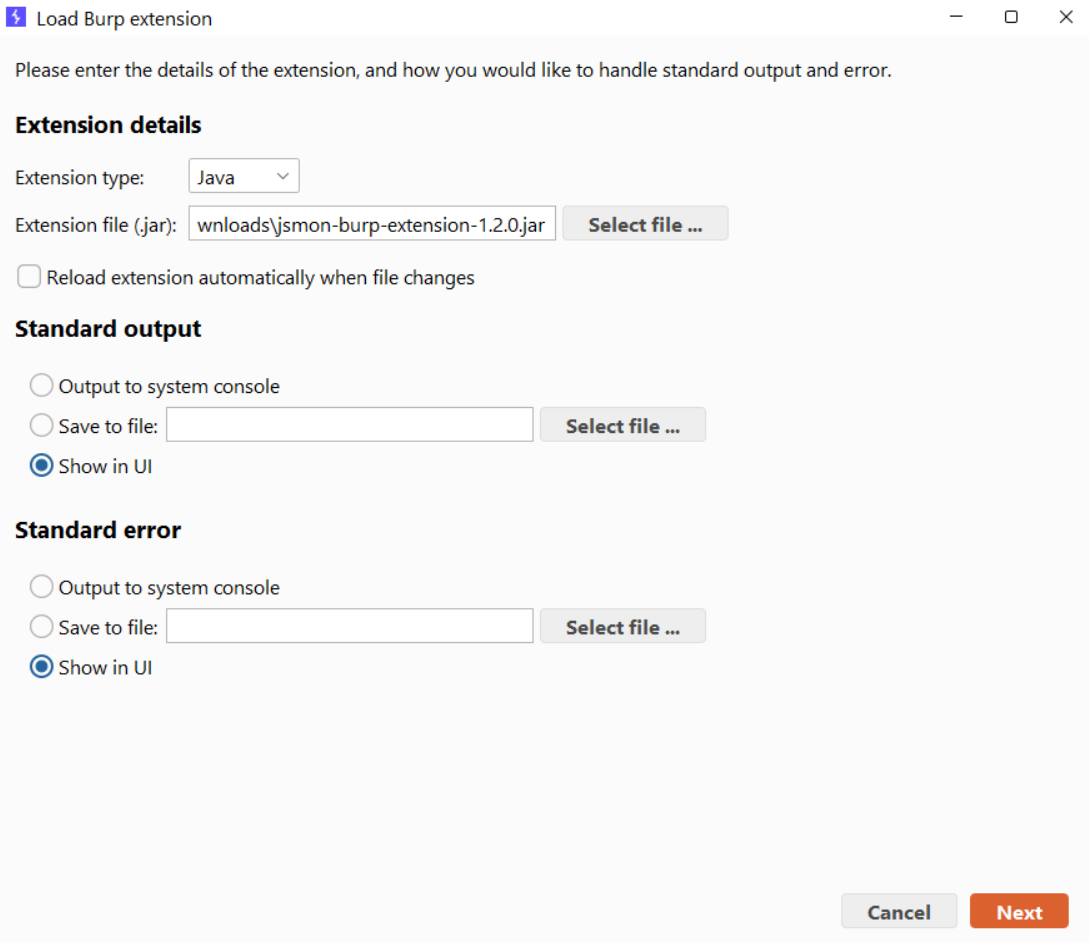
Load it into Burp
- Open Burp Suite and go to Extensions → Extensions
- Hit the Add button
- Make sure Extension type is set to
Java - Click Select file... and choose the
.jaryou just downloaded
Once it loads, you'll see a new "Jsmon" tab pop up in your main Burp interface.
Connecting to the Jsmon Cloud
Here's the thing about deep static analysis, it's heavy. Parsing abstract syntax trees and running pattern matching across massive minified bundles takes serious resources. We don't want to bog down your Burp instance with all that processing, so the extension acts as a lightweight bridge to our cloud engine.
To connect:
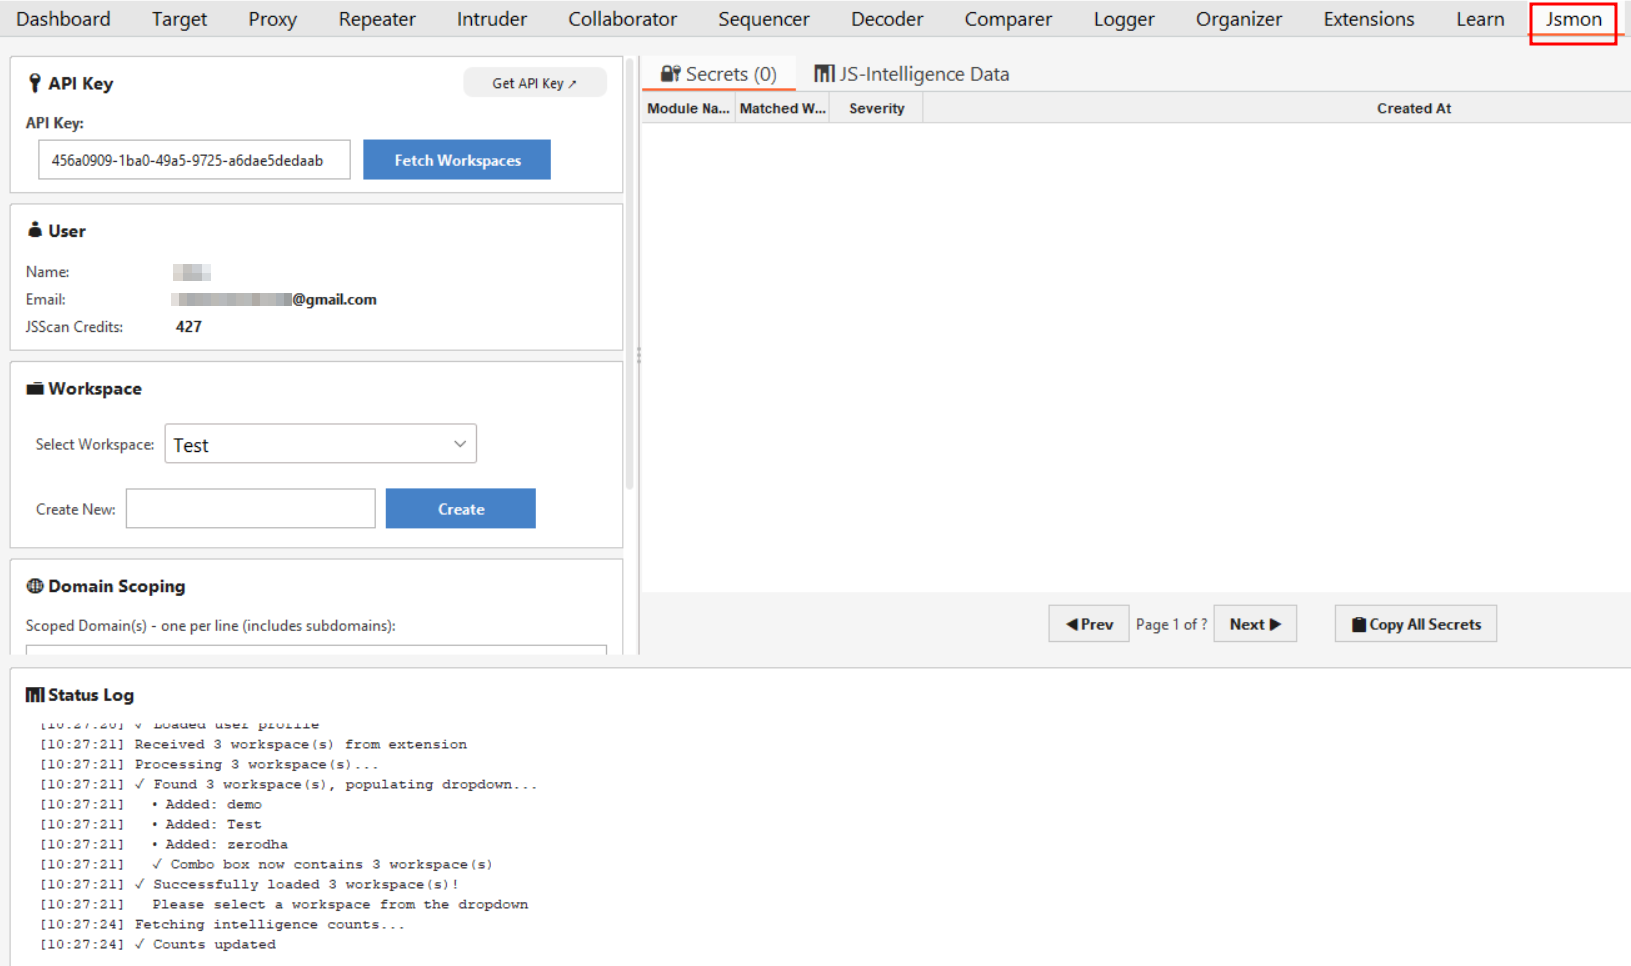
- Jump over to the Jsmon tab in Burp
- Paste in your API Key (you can generate this from your dashboard at
app.jsmon.sh) - Click Fetch Workspaces
You should immediately see the User panel fill in with your email and available scan credits. That means you're connected and ready to go.
Configuring Your Scans
This is where you tell the extension exactly how you want it to behave. The goal is to give you control so you're not burning through credits on irrelevant endpoints.
Workspace Management
The extension respects however you've organized your work. In the Workspace section, you can pick an existing project from the dropdown, maybe something like "Bug Bounty 2024" or "Client Pentest." Everything captured during your session gets organized into that project in your dashboard.
Need to create a new workspace on the fly? Just type a name in the "Create New" field and hit Create. Done.
Domain Scoping (This Part Matters)
This is probably the most important configuration setting. Modern web apps pull in tons of third-party scripts, analytics trackers, CDN libraries, social media widgets. You don't want to waste API credits scanning Google Analytics.
How to set it up:
In the Domain Scoping box, enter the specific domains you're actually testing. One per line. For example: target.com
The logic is simple: The extension will completely ignore any traffic that doesn't match these domains. Clean and efficient.
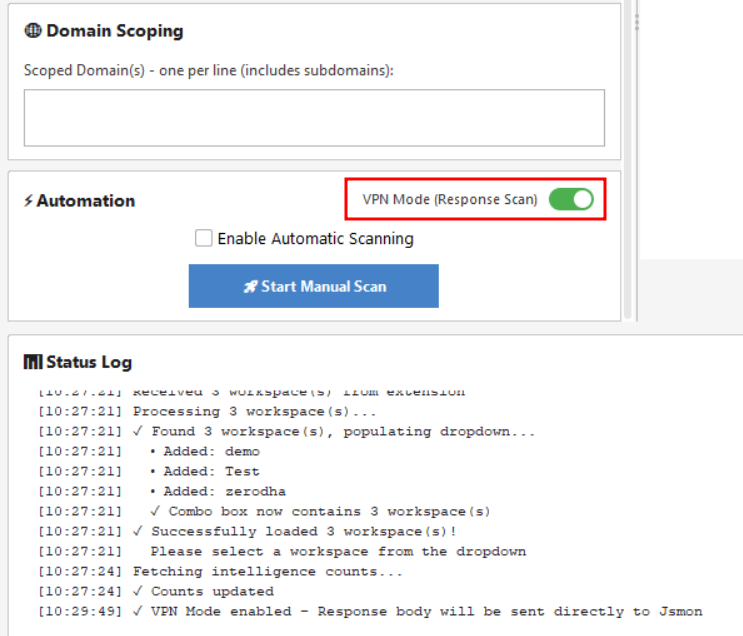
VPN Mode
This is the headline feature of v1.2.0. By default, the extension sends URLs to the Jsmon cloud, and the cloud engine visits them to perform the scan. But what if you are testing an internal application behind a corporate VPN, a firewall, or on localhost? The Jsmon cloud can't reach those.
Enter VPN Mode. Located in the Automation panel (upper right corner), toggling this ON changes the behavior completely. Instead of sending just the URL, the extension takes the response body (the actual code) directly from your Burp proxy and securely uploads it to the scanning engine.
- VPN Mode OFF: Extension sends URL -> Cloud visits URL -> Scans code. (Best for public sites).
- VPN Mode ON: Extension grabs code -> Uploads to Cloud -> Scans code. (Required for internal/VPN sites).
How to Actually Use It
You've got two approaches here, depending on how you like to work.
Passive Automation (Set It and Forget It)
Turn on Enable Automatic Scanning in the Automation panel.
Now just go about your normal testing. Browse the app, click around, do your thing. The extension watches your proxy traffic in the background. Every time a traffic from your scoped domains passes through, Jsmon grabs it and sends it for analysis automatically.
The benefit? You don't have to hunt for interesting assets. If your browser loads it, Jsmon scans it.
For Example, let's browse something.

Manual Trigger (Full Control)
Prefer to be more deliberate? Leave automation off. When you spot a specific endpoint or asset you want to dive into, just hit Start Manual Scan.
Status Feedback
The Status Log at the bottom gives you real-time updates. It'll confirm when your workspaces are found, when configs load, and when files successfully get sent for processing. Nothing happens in a black box.
Reviewing Your Results
You actually have two ways to view your findings.
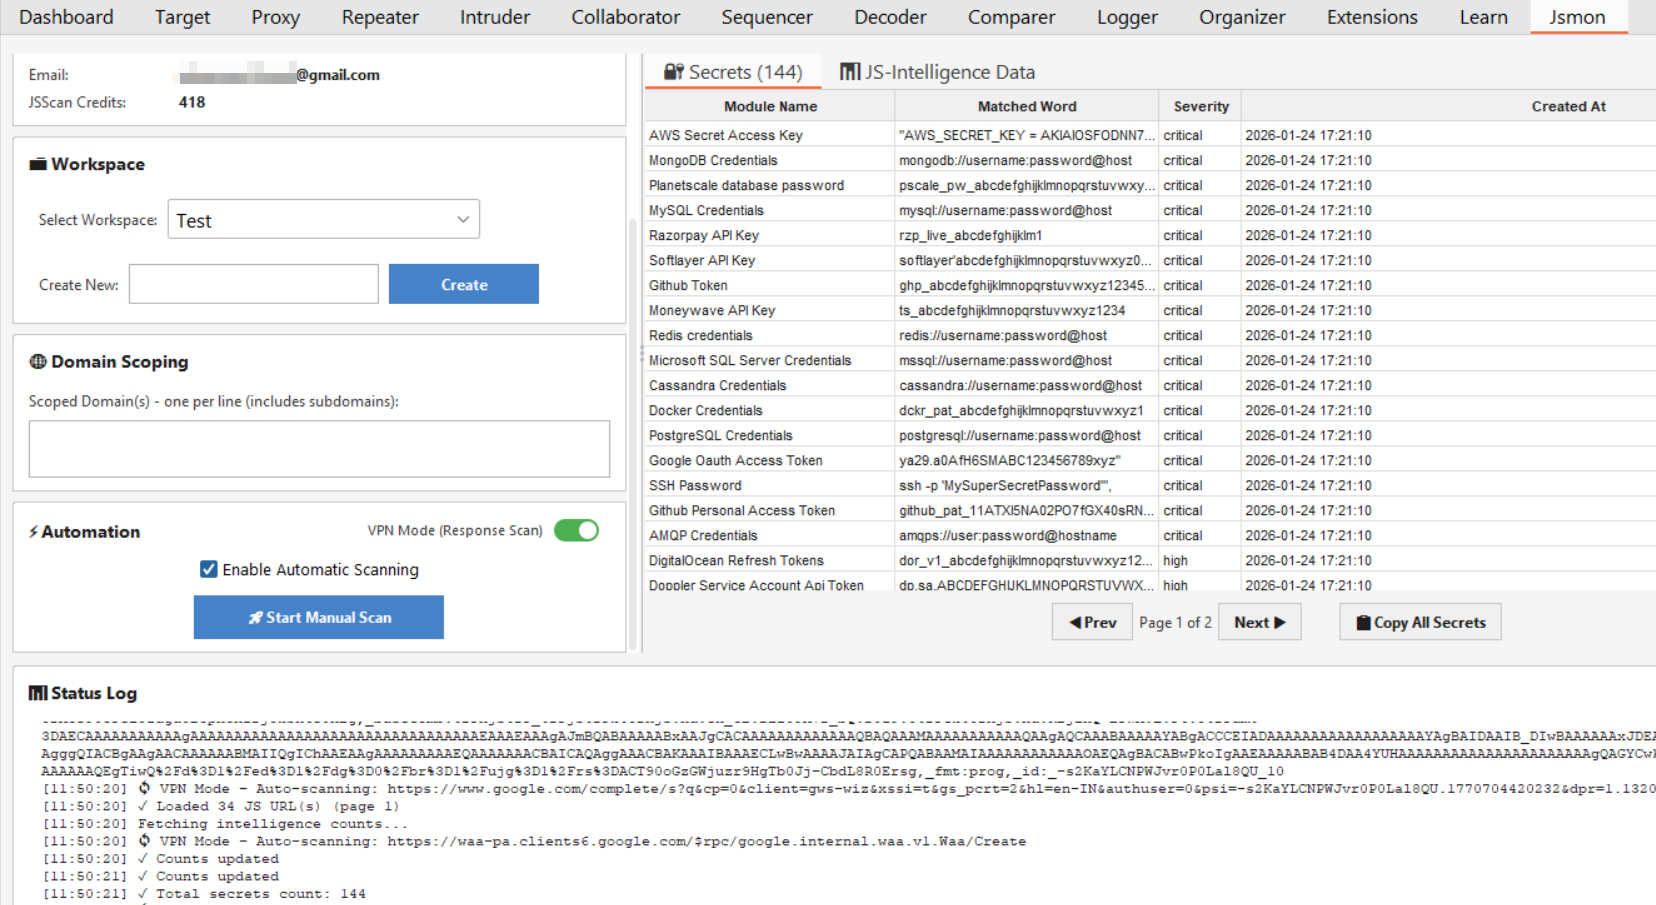
For immediate feedback, check the JS-Intelligence Data tab right inside the extension window. As scans complete, this table populates with high-level hits, showing the "Module Name" and "Matched Word" for any secrets or keywords detected in real-time. It’s perfect for a quick sanity check while you browse.
Here's what you'll see:
Once the scans start running, you have two primary views to analyze your findings, depending on whether you are hunting for critical vulnerabilities or gathering reconnaissance data.
1. The Secrets Tab
This is where you should look first. If the engine detects a hardcoded credential, API key, or token, it appears here instantly.
As you can see in the dashboard, this tab breaks down the findings clearly:
- Module Name: Identifies the type of secret found (e.g., "AWS Secret Access Key," "Google OAuth Access Token").
- Matched Word: Shows the specific code snippet or pattern that triggered the alert.
- Severity: A quick indicator (Critical, High, Medium) letting you know what needs immediate attention.
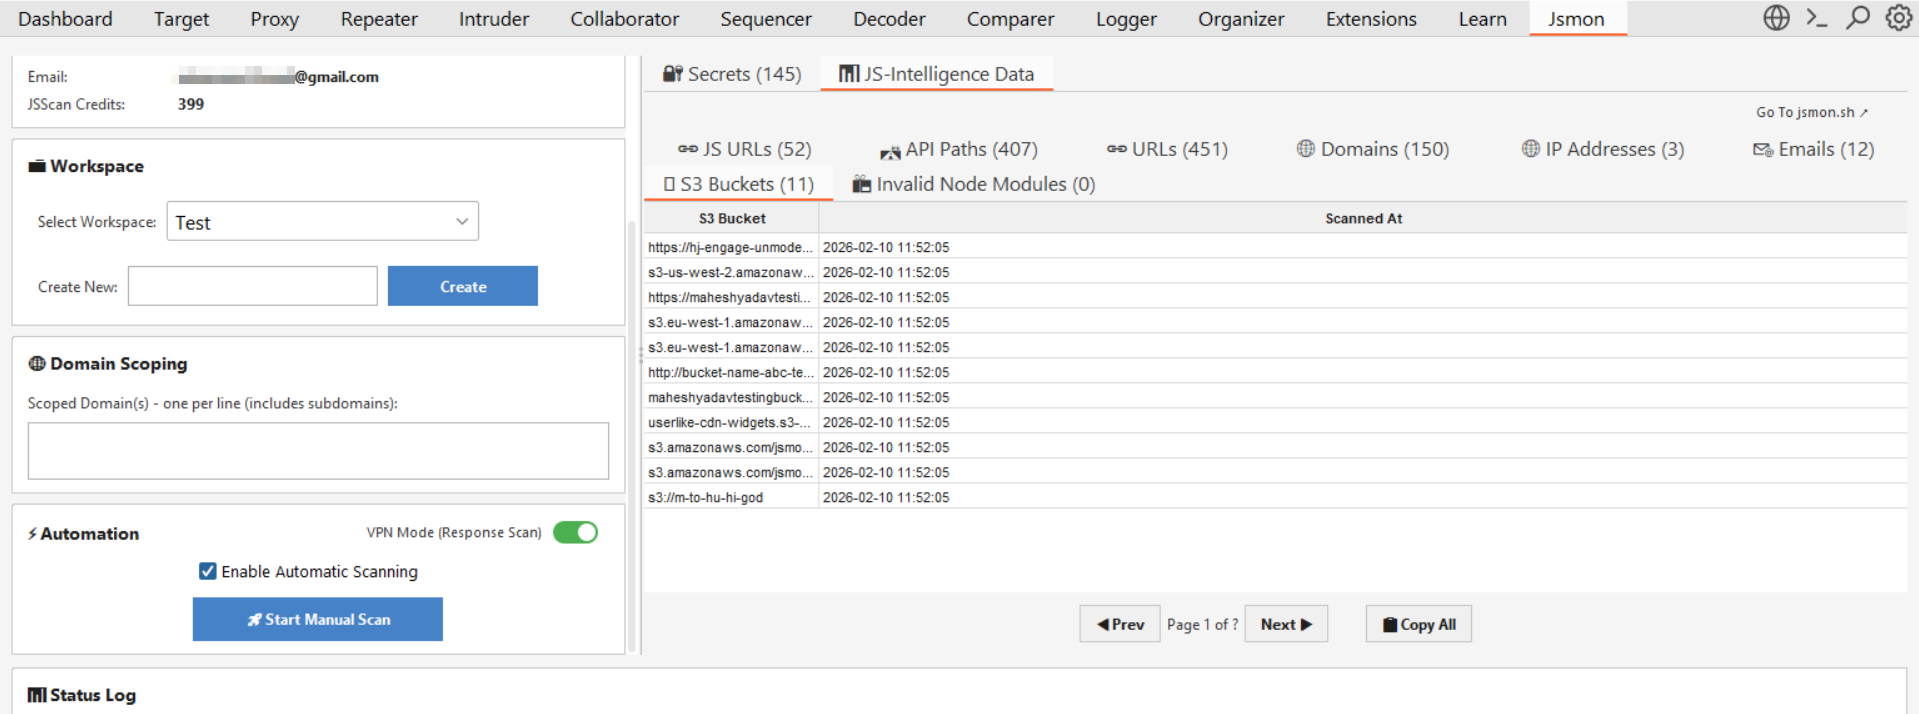
2. The JS-Intelligence Data Tab
For a deeper dive into the application's structure, switch to the JS-Intelligence Data tab. This section aggregates all the reconnaissance data extracted from the JavaScript files and organizes it into specific sub-tabs for easy filtering:
- S3 Buckets: Discover hidden cloud storage buckets hardcoded in the source.
- API Paths: A massive list of endpoints (like
/api/v1/useror/auth/login) extracted from the scripts, perfect for building custom wordlists for fuzzing. - Domains & Emails: Mapped out third-party dependencies and internal contact addresses found in the code.
- JS URLs: A clean list of every JavaScript asset captured during your session.
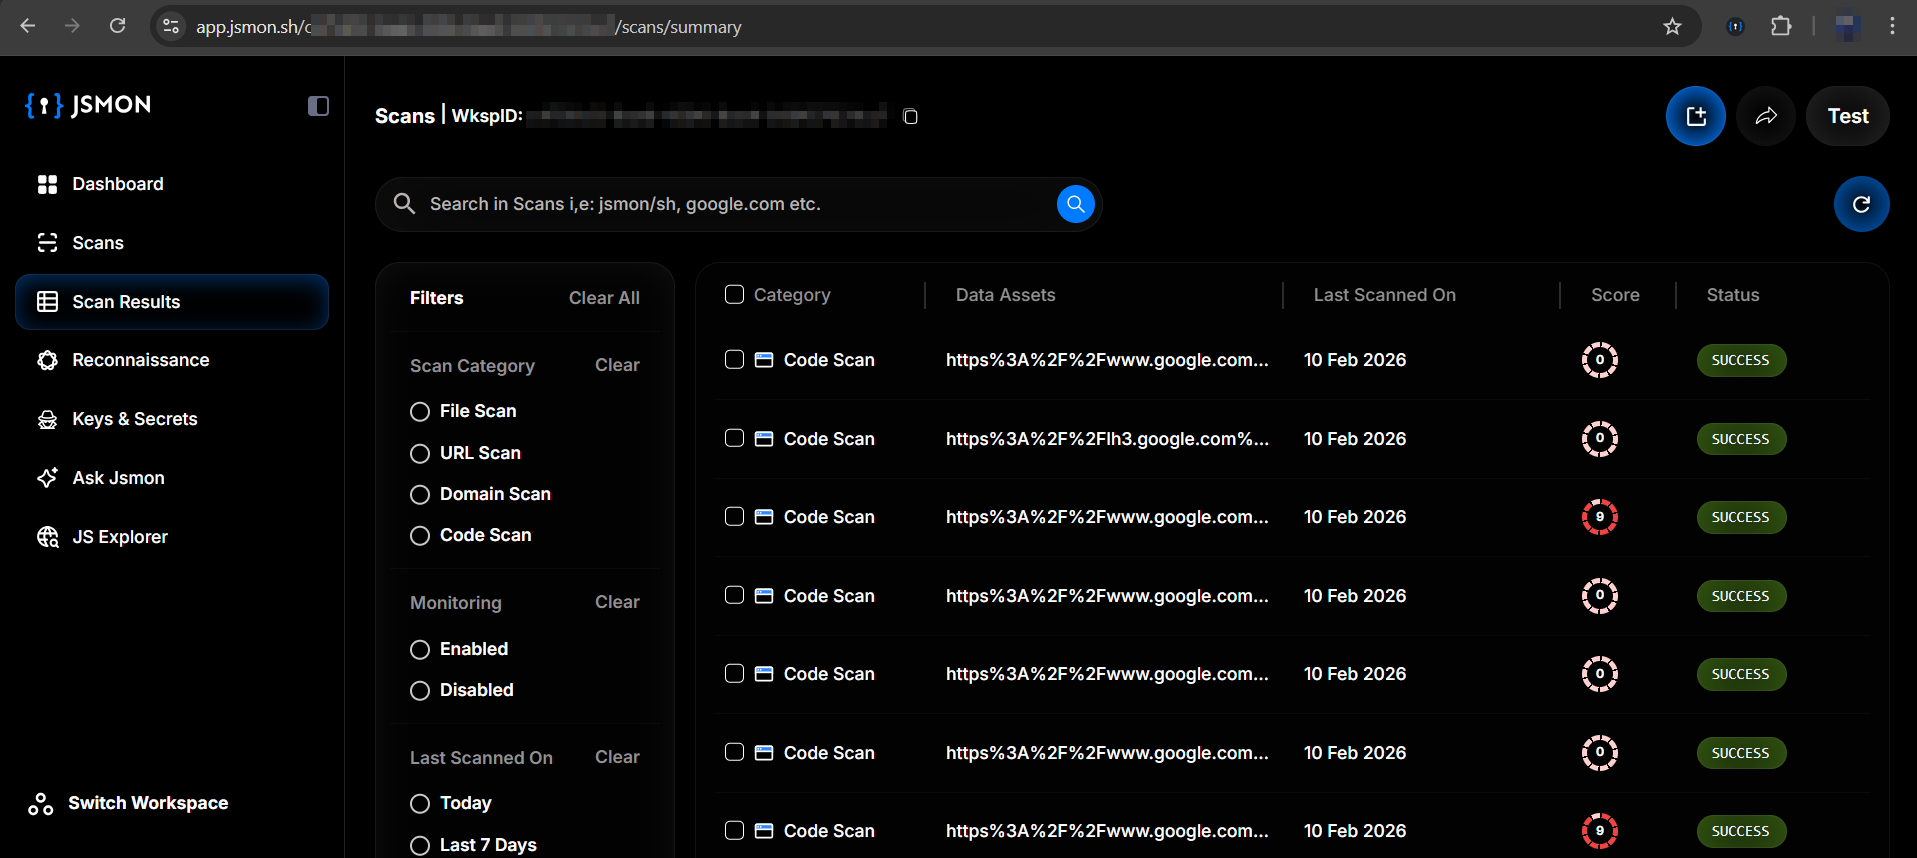
To truly dig into the code, you need more screen real estate. The extension automatically syncs everything to the cloud, so you can head over to https://app.jsmon.sh/scans/summary for the full analysis.
Why This Actually Matters
By bringing Jsmon into Burp, you're unifying your workflow. You don't have to pause your dynamic testing to go run static analysis. Essentially, every manual browsing session becomes a code audit at the same time.
It's one of those "why wasn't this already a thing" moments.
Want to give it a shot?
Download the extension from GitHub and start finding hidden vulnerabilities in your proxy traffic.
Pro tip: If you're running multiple engagements, create separate workspaces for each. Keeps your findings organized and makes reporting way easier later.